
Starter Plan - How to Set Up Voicemail
Setting up your voicemail with Voiply is quick and easy. Follow the steps below to make sure you never miss an important message.
Step 1: Log In to Your Account Portal
- Open your web browser and go to the Voiply Account Portal (opens in a new tab).
- Enter your login credentials and sign in.
Step 2: Open Voicemail Settings
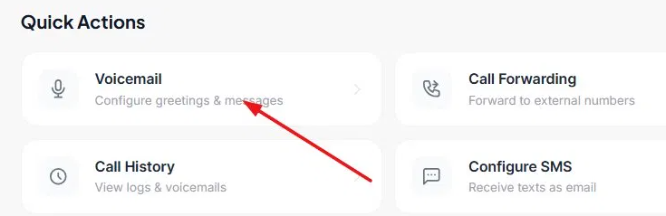
- Scroll down to the Quick Actions section.
- Click Voicemail (Configure greetings & messages).
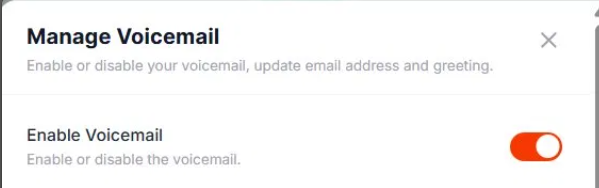
Step 3: Enable or Disable Voicemail
- Use the Enable Voicemail toggle to turn voicemail on or off.
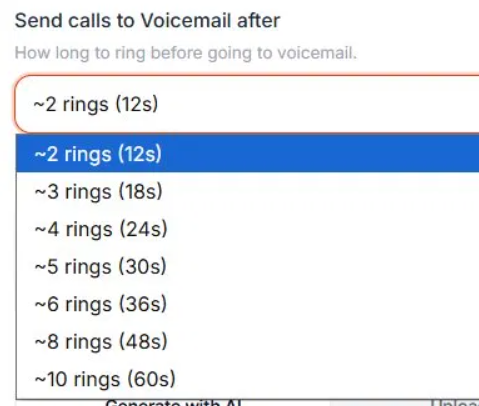
Step 4: Set How Long to Ring Before Voicemail Picks Up
- Under Send calls to Voicemail after, use the dropdown to choose how many rings before the call goes to voicemail.
- Options range from ~2 rings (12s) to ~10 rings (60s).
Step 5: Set Up Your Voicemail Greeting
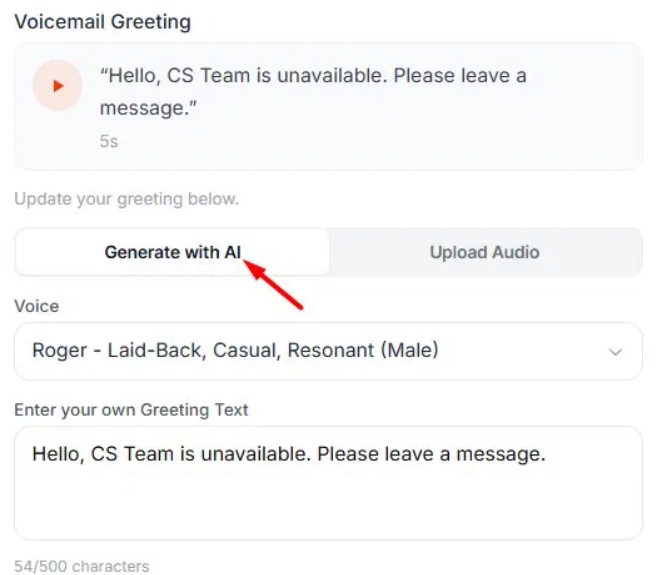
Your current greeting is shown in the Voicemail Greeting section — click the play button to preview it. To update it, choose one of the two options below.
- Option 1 – Generate with AI
- Click the Generate with AI tab.
- Select a voice from the Voice dropdown.
- Type your greeting message in the text field (up to 500 characters).
- Click Update Greeting to save and apply.
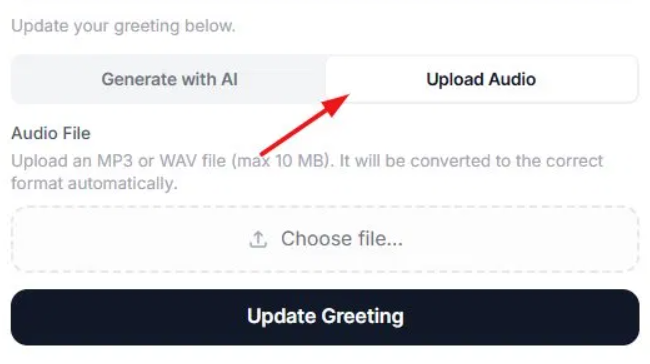
- Option 2 – Upload Audio
- Click the Upload Audio tab.
- Click Choose file and select an MP3 or WAV file from your device (max 10 MB). It will be converted to the correct format automatically.
- Click Update Greeting to save and apply.
Step 6: Set Your Voicemail Notification Email
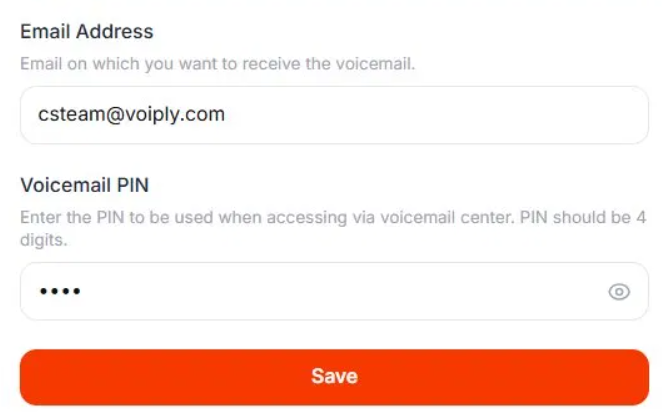
- Under Email Address, enter the email address where you want to receive voicemail recordings and transcripts.
Step 7: Set Your Voicemail PIN
- Under Voicemail PIN, enter a 4-digit PIN. This is used to access your messages through the voicemail center.
Step 8: Save Your Changes
- Click Save to apply all your settings.
Your voicemail is now set up and ready to use! If you need further assistance, feel free to contact Voiply Support.
Did this answer your question?
Glad it helped.