
Premier - How to Set Up and Manage Users in the Portal
As a Premier account admin, you can add new users right from your Voiply portal. Each new user gets their own extension. You can give them a brand new phone number or one you already own, and you can choose a desk phone or set them up to use the app only. This guide walks you through adding a user from start to finish. It also shows you how to manage that user afterward.
Prefer to watch? This video walks you through:
Before You Start
- You need admin access to the Premier portal.
- Adding a user adds a new seat to your plan, so check the monthly cost shown before you confirm.
- Have the user’s first name, last name, email, and an open extension number ready. Extensions can be any number from 100 to 699.
Step 1: Open the Users Page
- Log in to your Voiply portal.
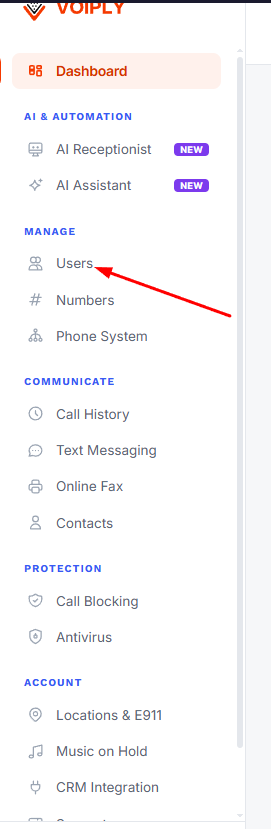
- In the menu on the left, under Manage, click Users.
Step 2: Find Your Way Around the Users Page
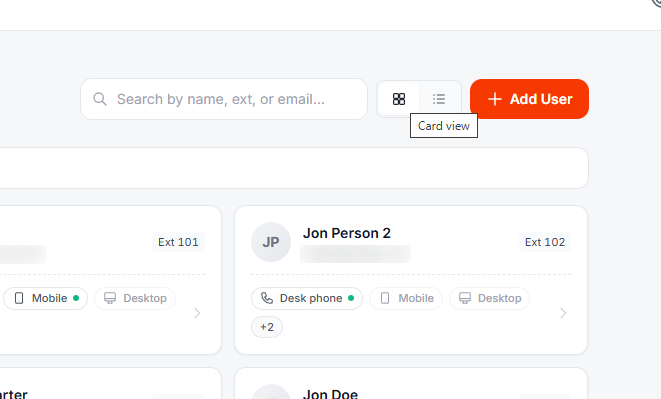
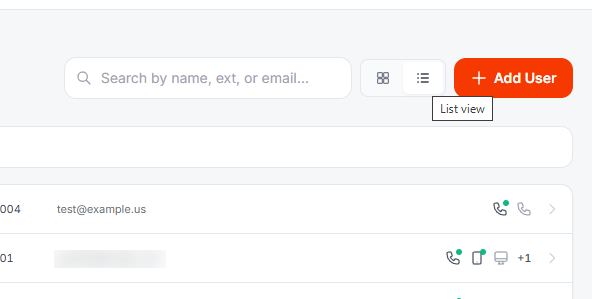
The Users page shows all of your current users, with a count at the top. Each user shows their name, email, extension, and the devices they use. A green dot next to a device means it’s connected.
You can change how the list looks:
- Card view shows each user on their own card.
- List view shows all users in a simple list, which is handy if you have a lot of users.
To find someone fast, type their name, extension, or email in the search bar.

Step 3: Start a New User
Click the Add User button in the top right. This opens a short setup with three steps.
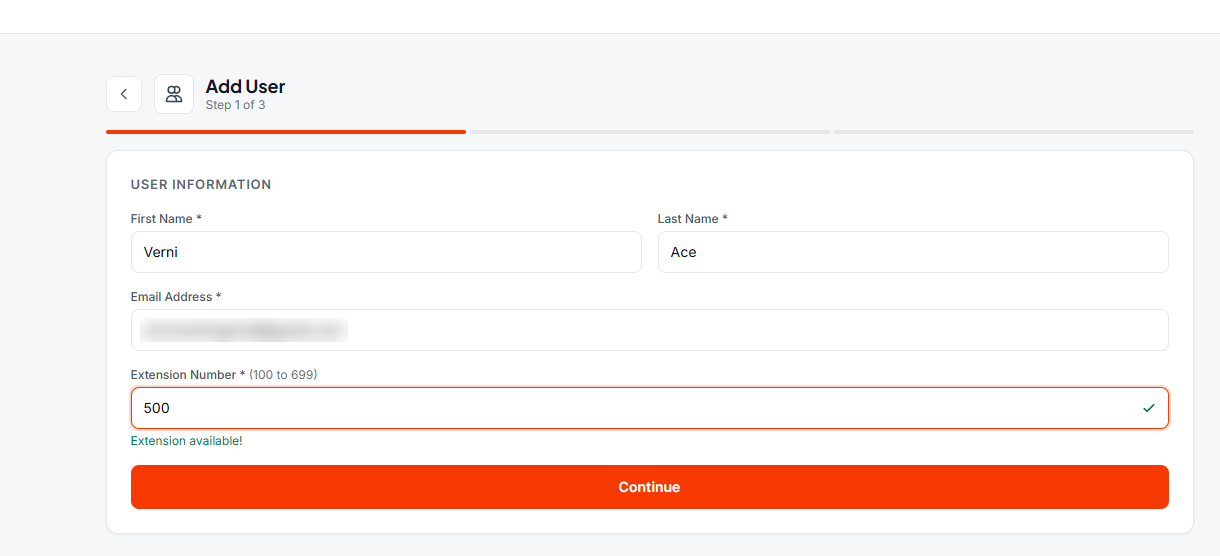
Step 4: Enter the User’s Information (Step 1 of 3)
Fill in these details:
- First Name
- Last Name
- Email Address (this is where the user gets their login and setup info)
- Extension Number (any number from 100 to 699, digits only)
When you type an extension, the portal checks it for you. If you see “Extension available!” you’re good to go. If not, try a different number.
Click Continue.
Step 5: Choose a Phone Number (Step 2 of 3)
Next, choose how this user will get their phone number. You have two choices.
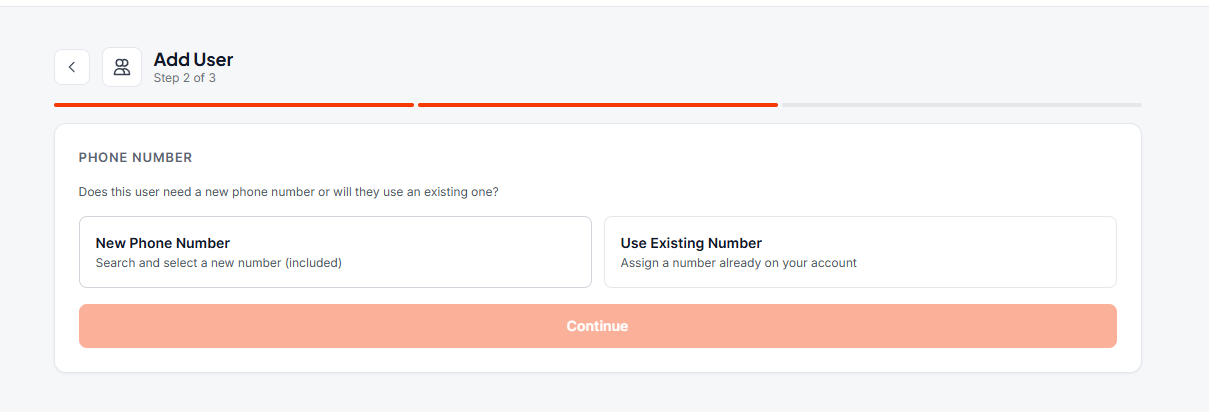
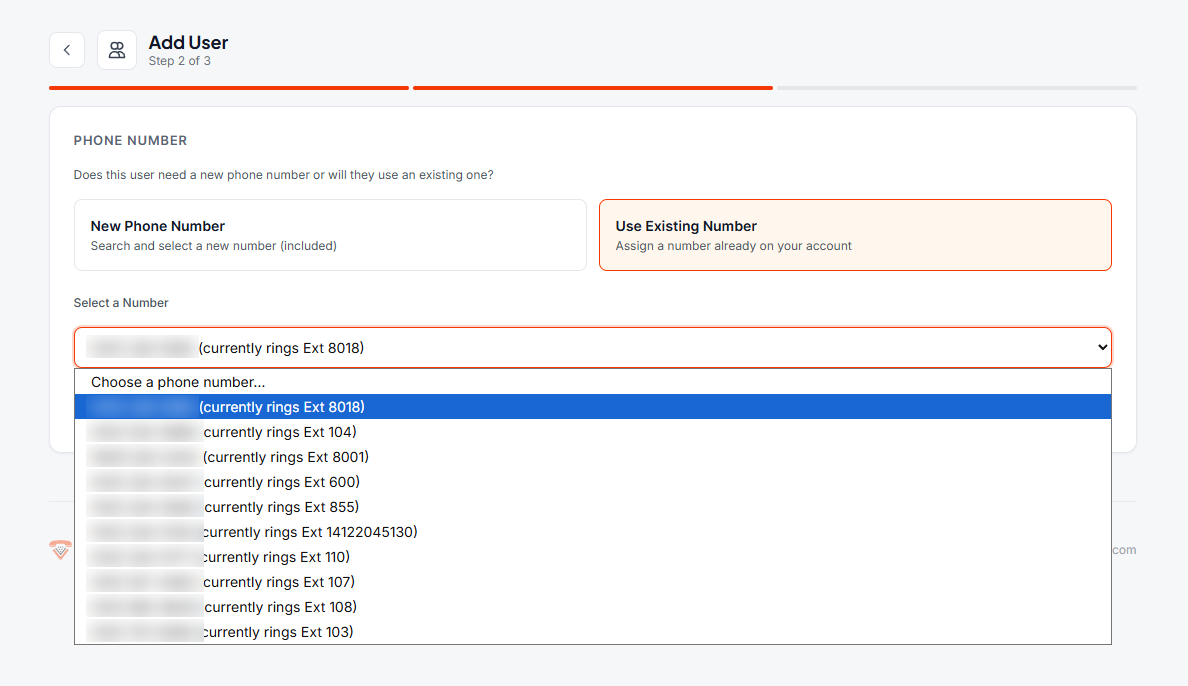
Option A: New Phone Number
- Click New Phone Number.
- Type a 3-digit area code. A list of available numbers will appear.
- Use Next and Previous at the bottom to see more numbers.
- Click the number you want, then click Continue.
A new number is included with the user’s seat, so there’s no extra charge.
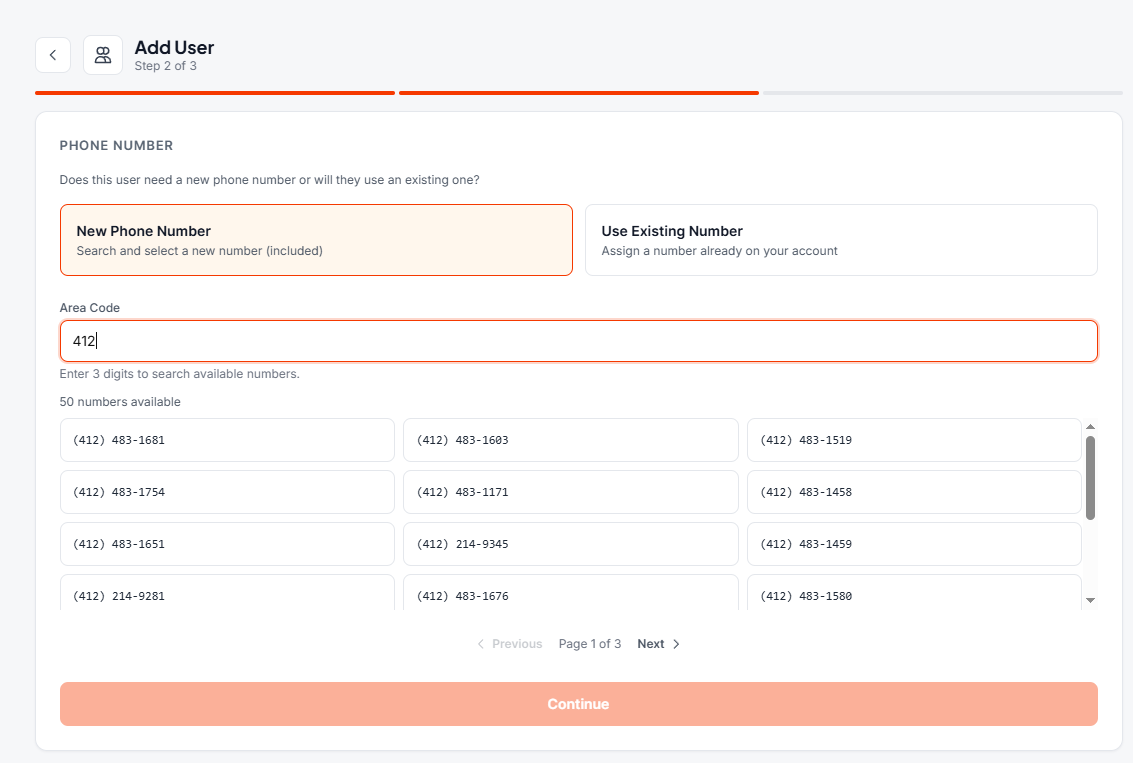
Option B: Use an Existing Number
- Click Use Existing Number.
- Open the Select a Number dropdown and pick a number already on your account. Each number shows which extension it rings right now.
- Click Continue.
Good to know: If the number you pick already rings another extension, it will move to this new user. The other extension will stop getting calls on that number. If you want both people to get those calls, contact us before you make the change.
Step 6: Choose a Desk Phone or App Only (Step 3 of 3)
Now decide whether this user needs a physical desk phone.
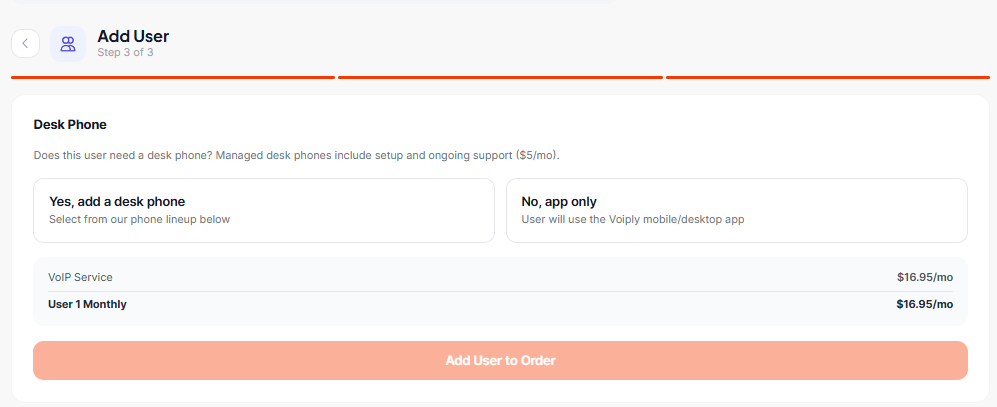
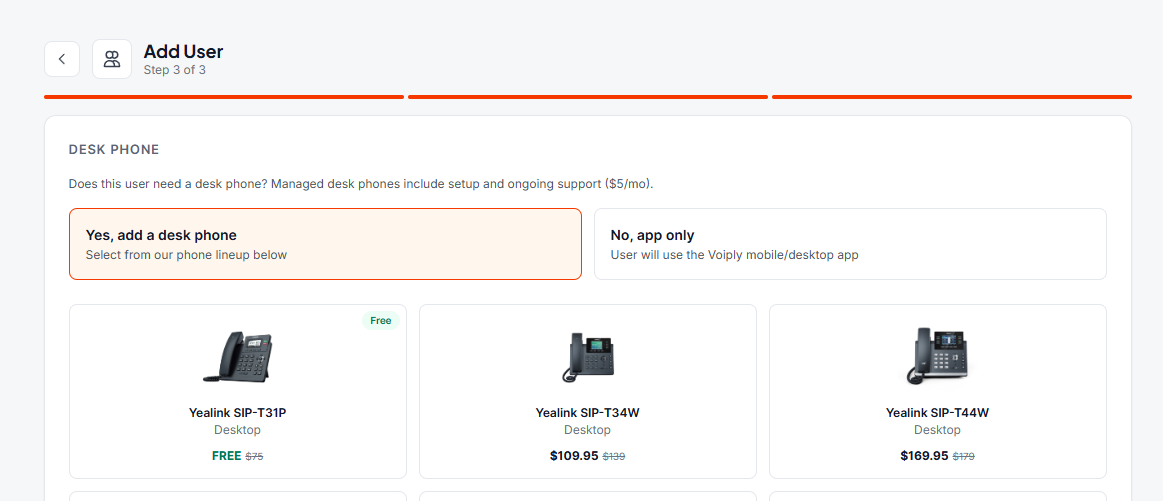
Option A: Yes, Add a Desk Phone
- Click Yes, add a desk phone.
- Look through the phone lineup and pick a model. Some phones are free, and others show a one-time cost on each card.
Managed desk phones include setup and ongoing support for $5 per month.
Option B: No, App Only
Click No, app only if the user will make and take calls using the Voiply mobile or desktop app. There’s no extra phone cost with this option.
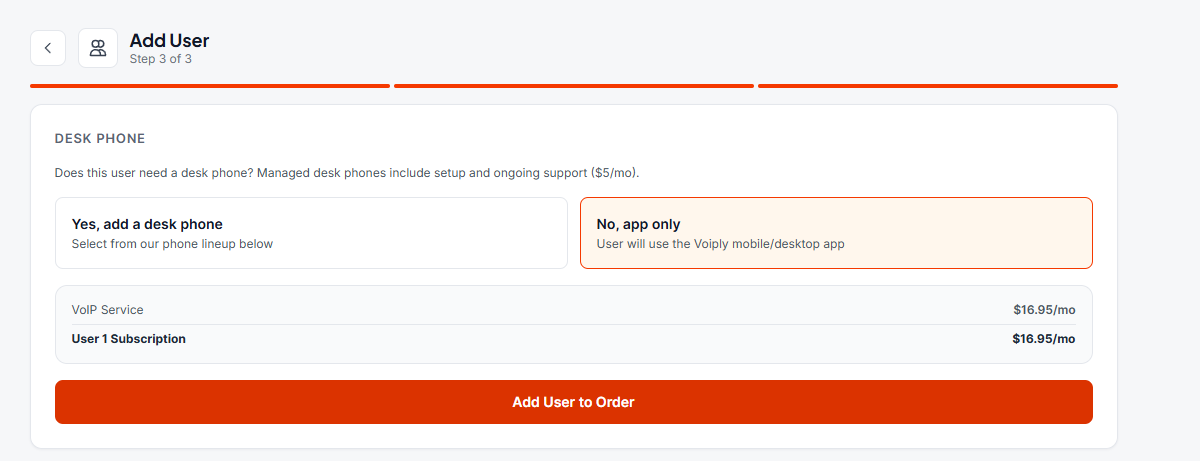
When you’re ready, click Add User to Order.
Step 7: Review Your Order
You’ll see the user you just set up, along with their extension, phone number, phone choice, and monthly cost. To take a user off the order, click the trash can icon next to their name.
From here you can:
- Click Add Another User to set up more users the same way.
- Click Place Your Order when you’re ready to check out.
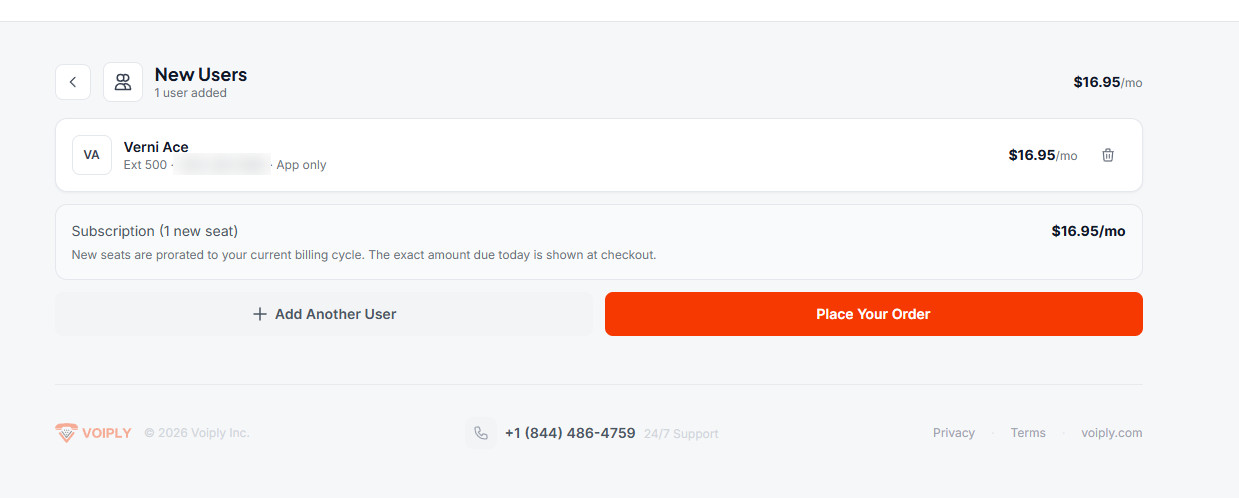
If your plan already has a paid seat that no one is using, you’ll see a note saying so. The new user will fill that open seat at no extra monthly charge.
Step 8: Confirm and Pay
On the Order Confirmation screen, look over your order one more time. You’ll see:
- The amount due today
- What your plan will renew at going forward
If you added a desk phone, enter the shipping address where the phone should go.
A few things to know about billing:
- New seats are prorated to your current billing cycle. This means you only pay for the days left in the cycle.
- After that, you’ll be charged the full amount each billing cycle.
- Your payment method on file is charged automatically.
When everything looks right, click the Place Your Order button at the bottom. It shows the exact amount you’ll be charged. You’ll see a success message, and a confirmation email will go to your account email.
Set Up and Manage a User
After a user is added, you can change their settings at any time.
Open a User’s Settings
- In the menu on the left, click Users.
- Find the user and click their card or row.
This opens their settings page. At the top, you’ll see the user’s name, extension, and email. Below that are their devices and their status. Under those are three tabs: Profile, Voicemail, and Call Forwarding.
To go back to your full list, click Back to users in the top left.
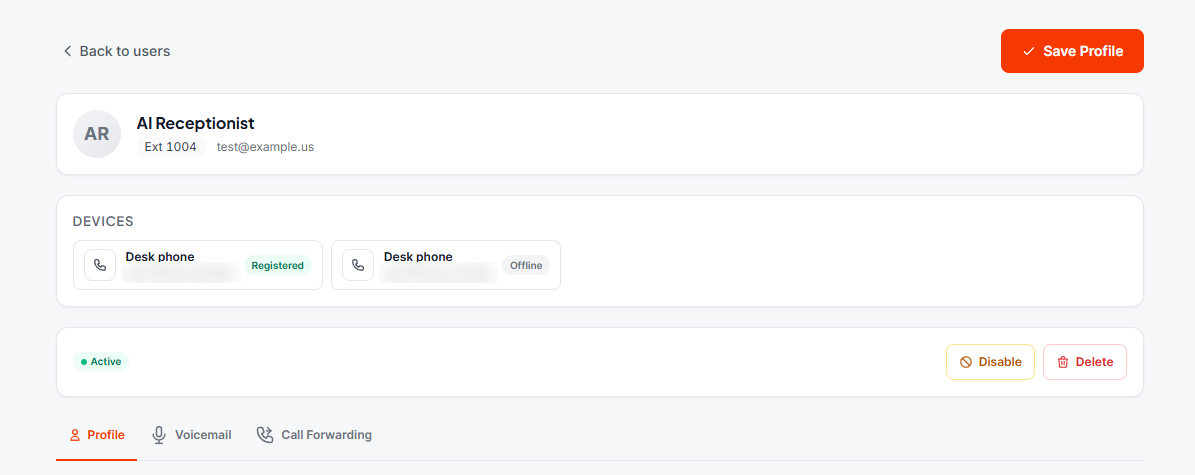
Devices
The Devices section shows every device the user is signed in on, like a desk phone, the Voiply mobile app, or the desktop app. Each device shows a status:
- Registered means the device is connected and ready for calls.
- Offline means the device isn’t connected right now.
If a device shows Offline and it should be working, check that it’s plugged in or signed in and connected to the internet.
Profile Tab
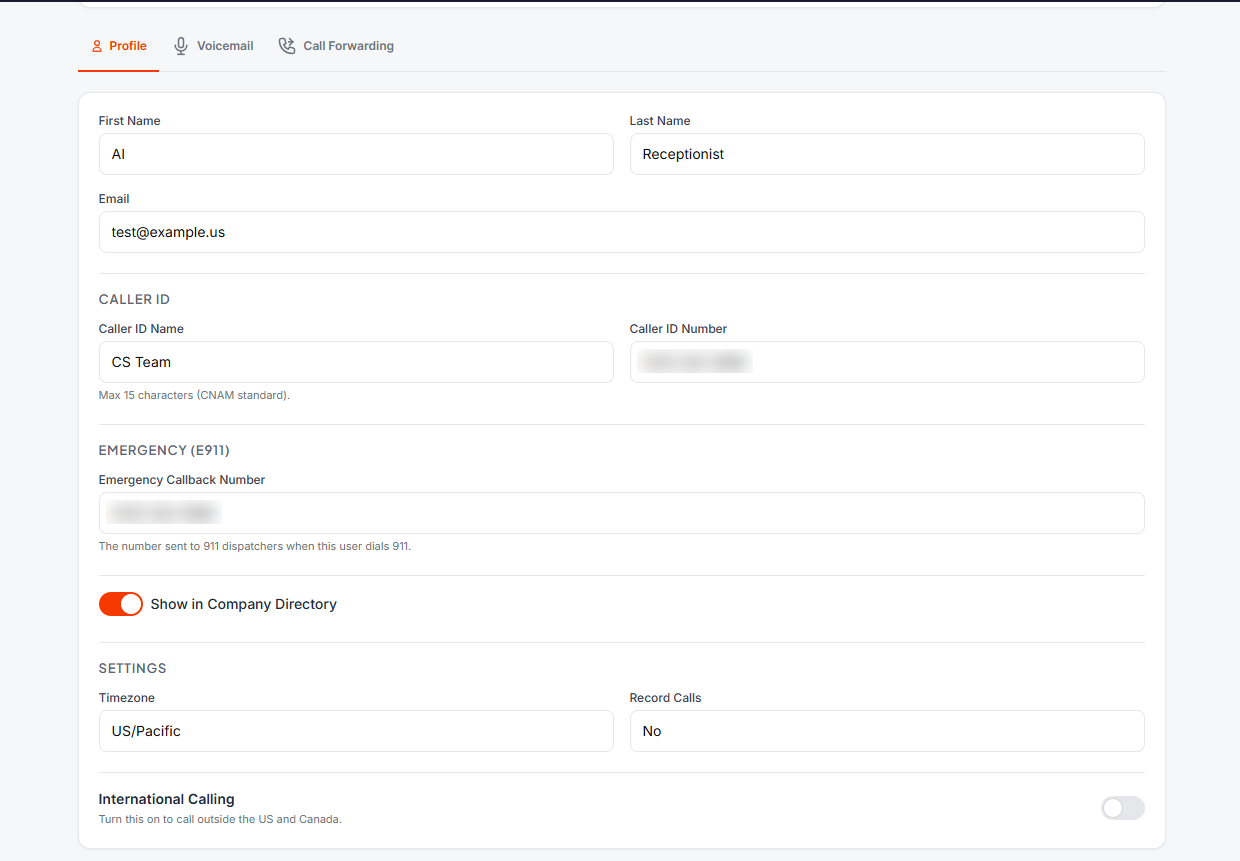
The Profile tab is where you manage the user’s main details:
- First name, last name, and email
- Caller ID Name and Caller ID Number (the name can be up to 15 characters)
- Emergency Callback Number for E911 (this is the number sent to 911 dispatchers if the user dials 911)
- Show in Company Directory (turn this on to list the user in your directory)
- Timezone and Record Calls
- International Calling (turn this on to allow calls outside the US and Canada)
Click Save Profile in the top right when you’re done.
Voicemail Tab
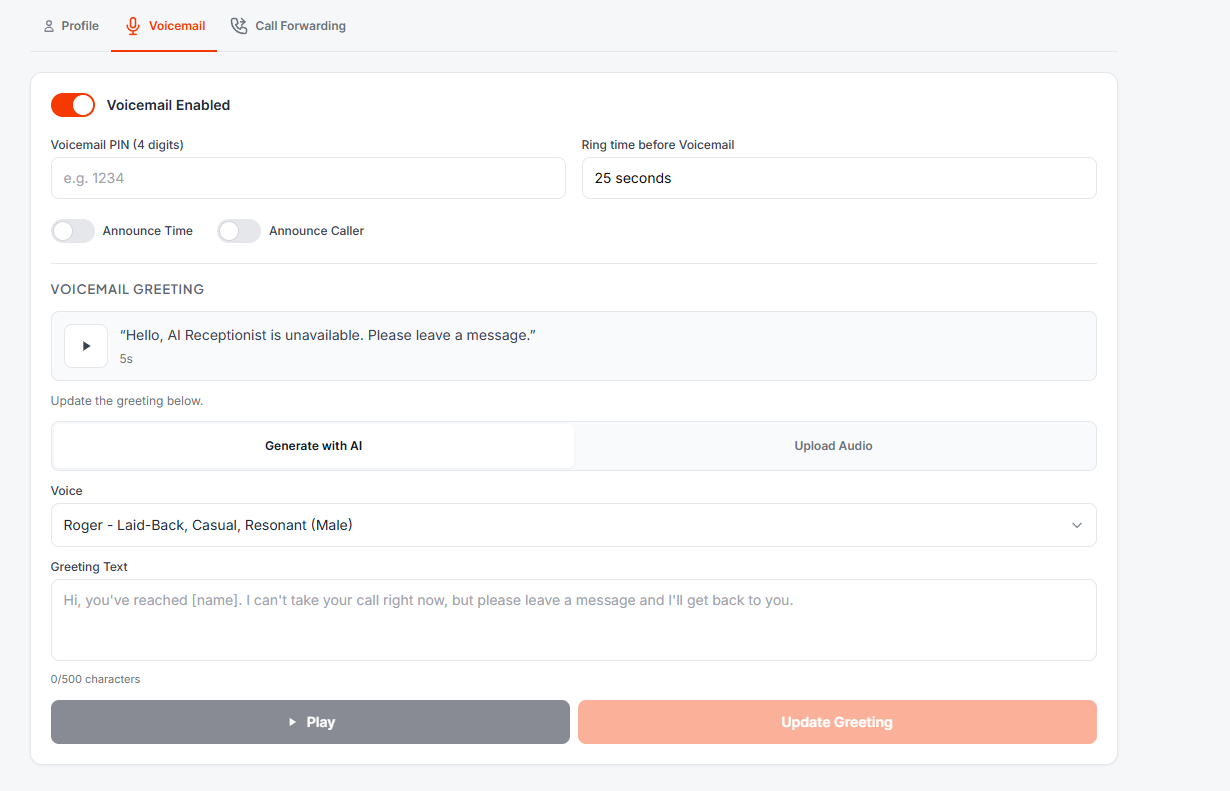
The Voicemail tab lets you manage the user’s voicemail box:
- Turn voicemail on or off
- Set a 4-digit voicemail PIN
- Choose the ring time before a call goes to voicemail (in seconds)
- Turn on Announce Time or Announce Caller if you’d like
Under Voicemail Greeting, you can play the user’s current greeting. To change it, pick one of these:
- Generate with AI: pick a voice, type your greeting (up to 500 characters), then click Play to hear it.
- Upload Audio: upload your own recording.
Click Update Greeting to save it.
Call Forwarding Tab
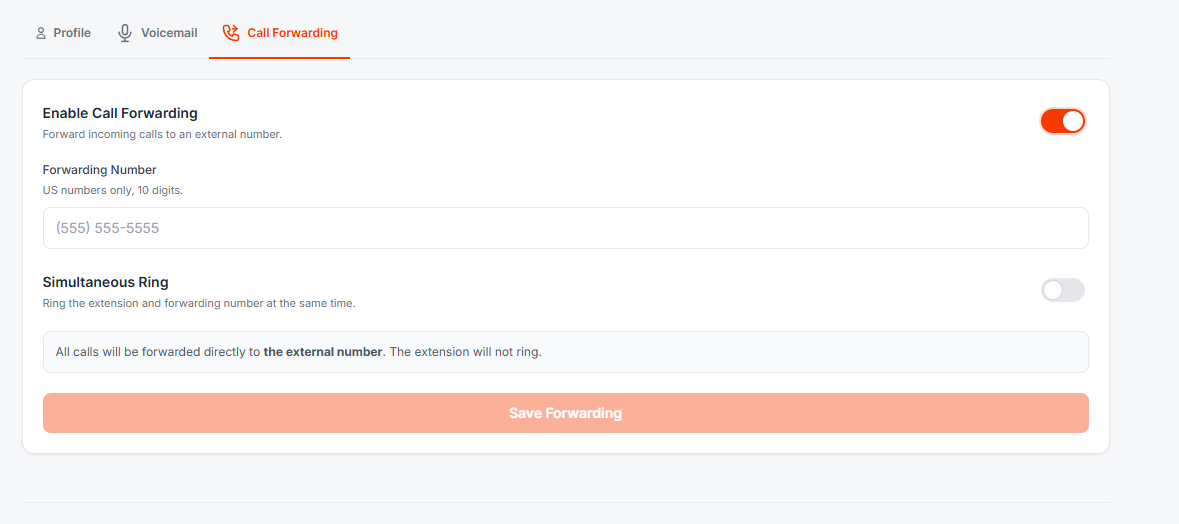
The Call Forwarding tab lets you send the user’s incoming calls to an outside number.
- Turn on Enable Call Forwarding.
- Enter the Forwarding Number. This must be a 10-digit US number.
- Choose how calls should ring:
- Leave Simultaneous Ring off to send all calls straight to the outside number. The user’s extension will not ring.
- Turn Simultaneous Ring on to ring the extension and the outside number at the same time.
- Click Save Forwarding.
To stop forwarding, turn off Enable Call Forwarding and click Save Forwarding.
Disable or Delete a User
Near the top of the user’s settings page, next to their status, you’ll find two more options:
- Disable turns off the user for now without removing them. This helps if someone is away or on leave. You can turn them back on later.
- Delete removes the user for good. Removing a seat may change your monthly bill.

Need Help?
If you have questions about adding or managing users, call us at (844) 486-4759 or email support@voiply.com.
Did this answer your question?
Glad it helped.